
Key takeaways:
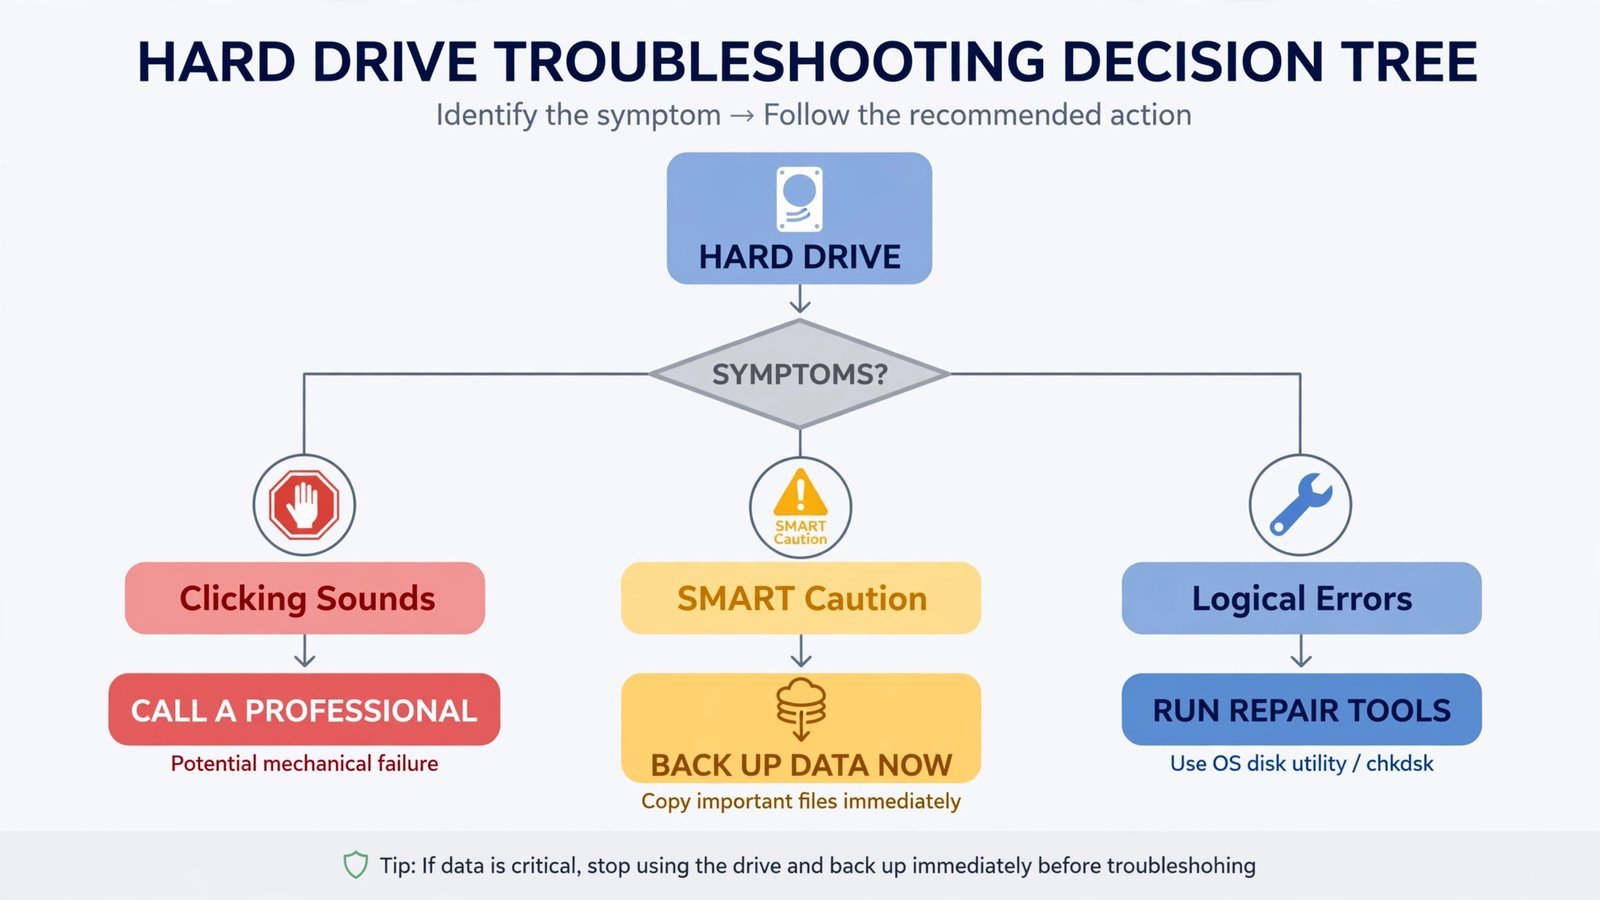
- Start with your drive’s SMART health data, it tells you whether the drive is dying before you waste hours on scans.
- Windows’ built-in Error Checking (CHKDSK) fixes logical file-system errors for free; no download needed.
- CrystalDiskInfo gives you an honest, free health verdict (Good / Caution / Bad).
- No software can fix a physically failing drive. If it clicks, grinds, or vanishes from BIOS, stop and back up, then call a professional.
A failing hard drive doesn’t just mean a broken part, it means your photos, documents, and years of work are one bad sector away from gone. This guide gives you three methods to check and repair a drive, in order from easiest to most involved, and tells you honestly where software stops helping.
The one rule before you touch anything
If the drive still works at all, back up your most important files right now, before running any scan or repair. Every minute a failing drive spins is a minute it can get worse, and scans stress the drive.
Warning: If the drive is clicking, grinding, beeping, or not showing up in BIOS at all, do not run any software on it. That’s physical damage, and scanning a dying drive can finish it off. Power it down and read the “what software can never fix” section at the end instead.
Method 1: Check SMART health, then run Windows Error Checking
This is the built-in, free route, no downloads, no accounts, no upsells. It has two parts: first look at what the drive says about itself, then let Windows fix what it can.
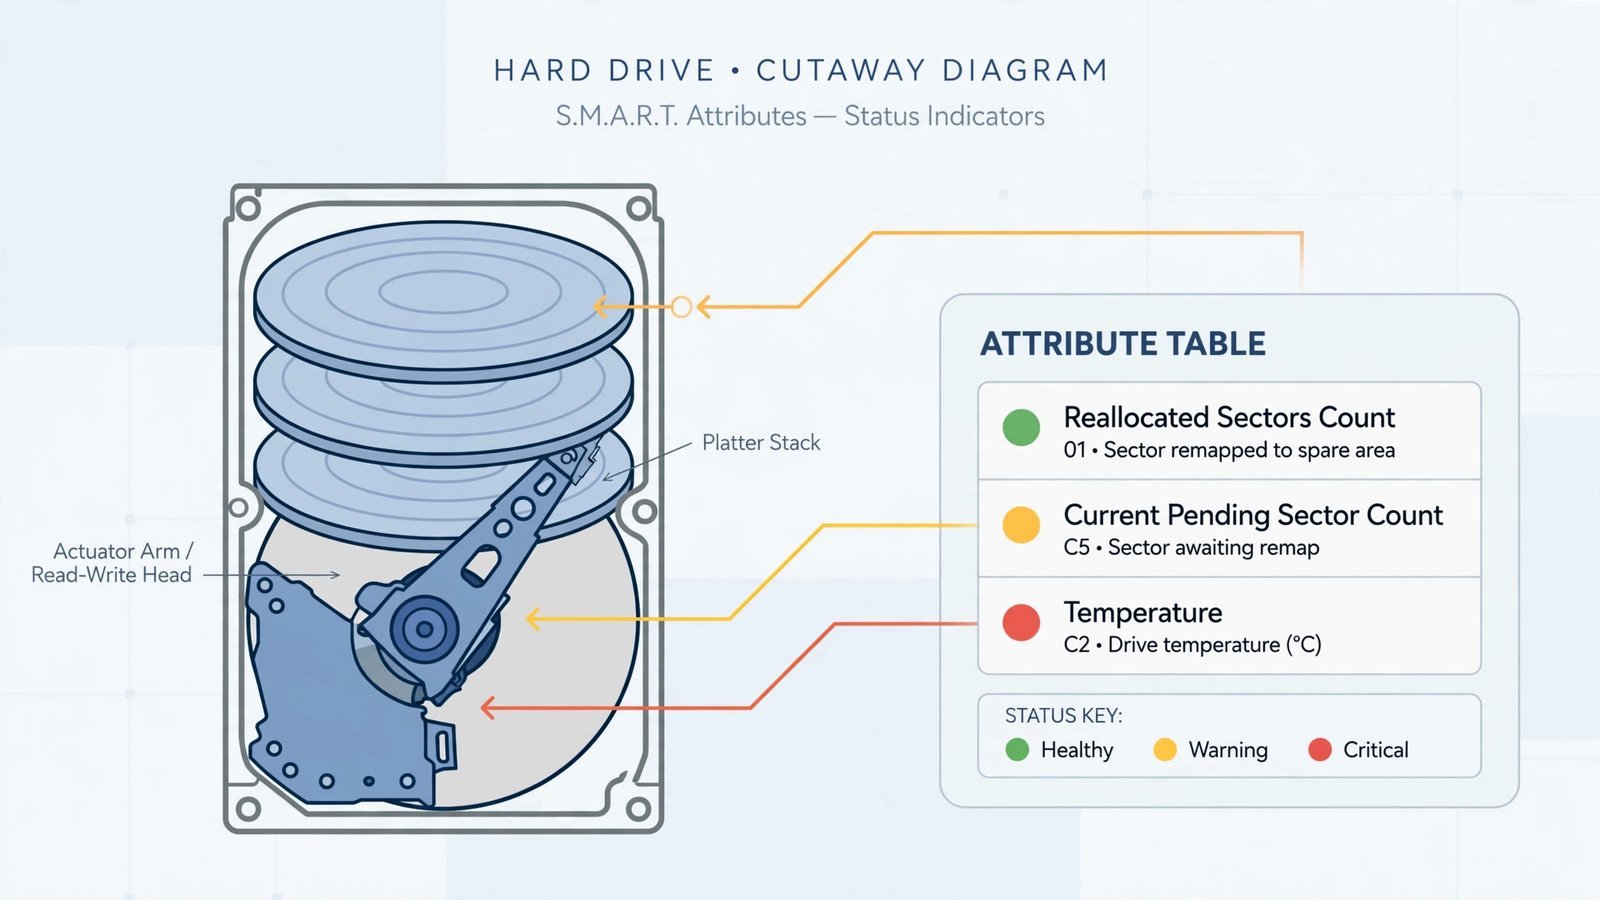
Part A, read the drive’s SMART data. Every modern drive keeps a self-diagnostic log called SMART (Self-Monitoring, Analysis and Reporting Technology): reallocated sectors, pending sectors, temperature, power-on hours. Windows doesn’t show you this natively, which is why Method 2 exists, but knowing the term matters, because “check the SMART status” is the first thing any technician will ask about.
Part B, run CHKDSK. Windows’ Error Checking tool (the command-line version is called CHKDSK) scans the file system for logical errors, corrupted indexes, bad sectors it can fence off, directory problems after a power cut, and fixes what it safely can.
- Open Command Prompt as Administrator (search “cmd”, right-click, Run as administrator).
- Type the following, replacing
C:with your drive’s letter:chkdsk C: /f /r - The
/fflag tells it to fix file-system errors;/rtells it to locate bad sectors and recover readable data from them. The/rimplies/f, but typing both is the common convention. - If it’s your system drive, Windows will offer to schedule the scan for the next restart, type
Yand reboot. The scan runs before Windows loads. - Don’t interrupt it. A 1 TB drive can take several hours; that’s normal.
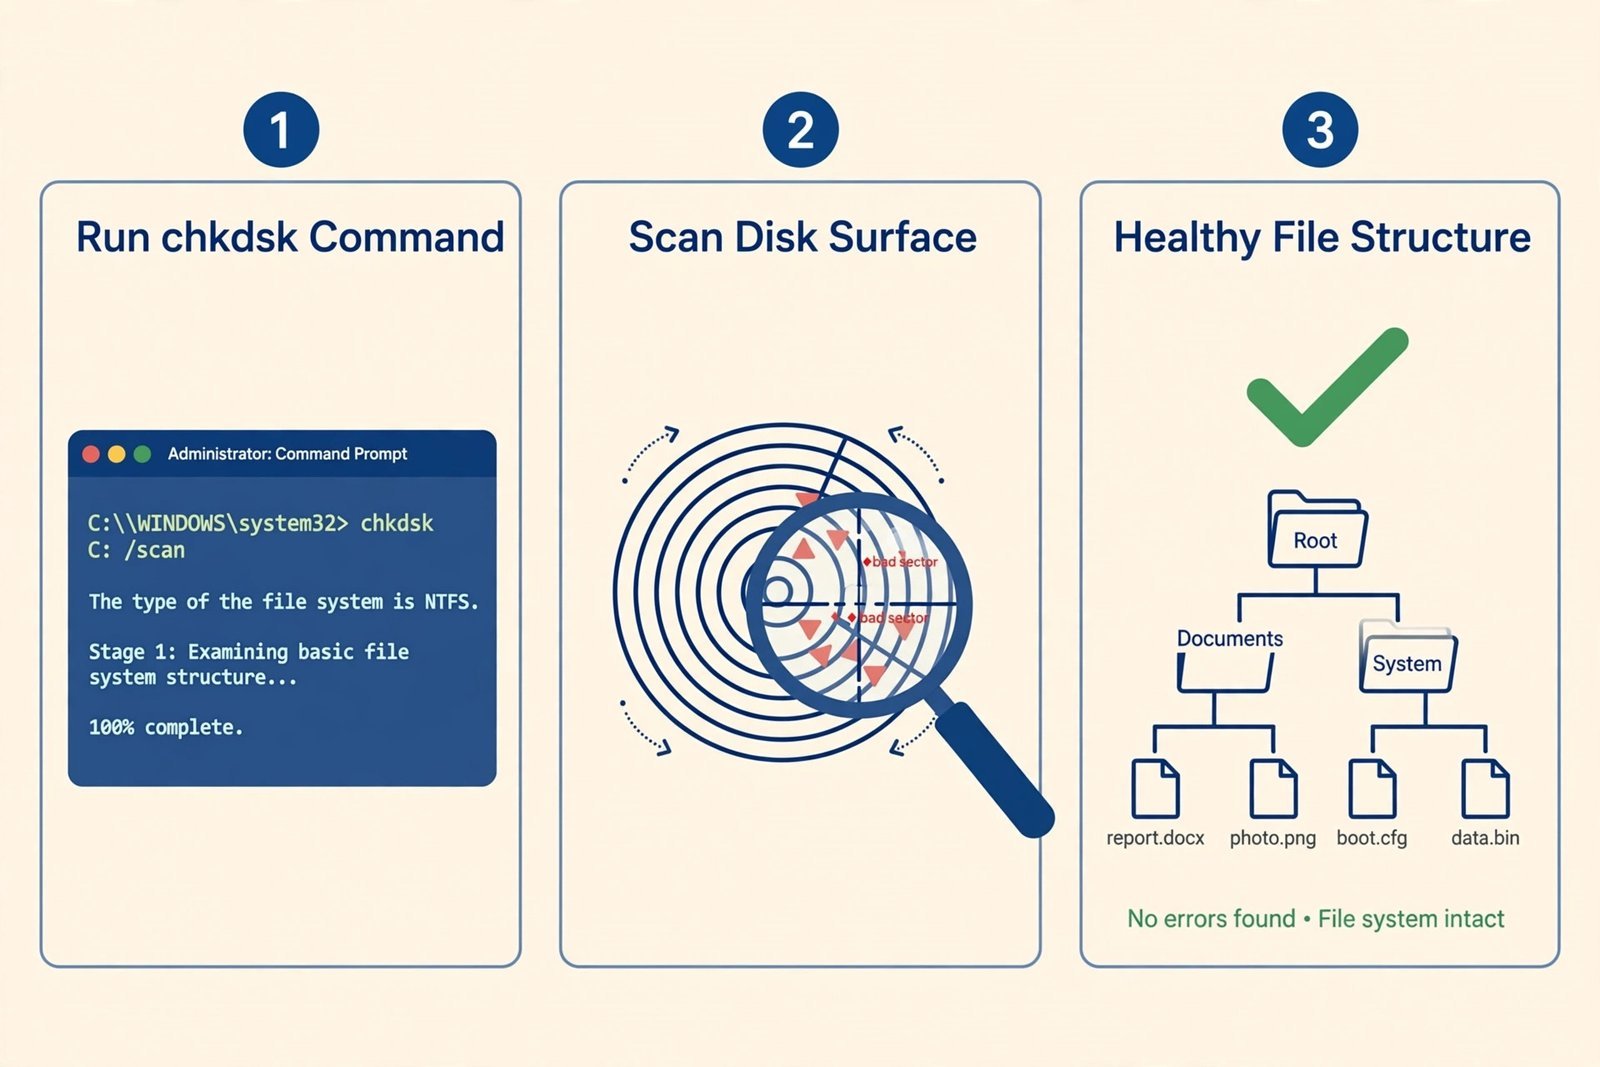
Note: CHKDSK fixes logical problems, the filing system, not the hardware. If the scan finds growing numbers of bad sectors on repeat runs, that’s the drive telling you it’s dying. Back up and replace it; no further software will change that.
Method 2: Get an honest diagnosis with CrystalDiskInfo
CrystalDiskInfo (free, Windows, currently at version 9.9.2) does the one thing Windows won’t: it reads the drive’s SMART data and translates it into a plain verdict, Good (blue), Caution (yellow), or Bad (red). It works with HDDs, SSDs, NVMe drives, and most USB externals, and there’s a portable version that runs without installing anything.
- Download it from the official CrystalDiskInfo site (labeled as a direct download page), avoid third-party download wrappers.
- Run it and look at the big status box for each drive. That’s your answer in one glance.
- If it says Caution, look at which attribute triggered it, commonly Reallocated Sectors Count or Current Pending Sector Count. Either means the drive is remapping failing areas: back up now and plan a replacement.
- If it says Bad, stop using the drive for anything except copying your files off it, in order of importance.
CrystalDiskInfo can’t repair anything, and that’s the point. It’s a thermometer, not medicine. Its job is to stop you from wasting a weekend running repair tools on a drive that needs replacing.
Method 3: Recover partitions and files with TestDisk and PhotoRec
When the problem is lost partitions or deleted files rather than a dying drive, TestDisk and PhotoRec, two free, open-source tools from CGSecurity, bundled in one download, are the honest workhorses. TestDisk rebuilds damaged partition tables and boot sectors; PhotoRec carves files out of raw disk data even when the file system is wrecked. Both run on Windows, Mac, and Linux.
- Get them from the official CGSecurity download page (direct download). The real tools are free with no “Pro” tier, if a download asks you to pay, you’ve got a fake.
- Extract the archive and run
testdisk_win.exe(orqphotorec_win.exefor PhotoRec with a graphical interface). - For a lost partition: choose the drive, select the partition table type (usually Intel/EFI), run Analyse, and let it find your missing partitions before writing anything.
- For deleted files: run PhotoRec, select the drive, choose where to save recovered files, on a different drive, never the one you’re recovering from.
Warning: PhotoRec recovers file contents, not file names, expect folders full of generically named files to sort through. And it can’t recover data that’s been overwritten. The less you’ve used the drive since the loss, the better your odds.
Two honest footnotes. HDDScan is a decent free tool for surface-testing a drive (reading every sector to map the damage), useful before you decide a drive is trustworthy again. SpinRite (paid, $89) is the legendary name old-timers mention, it can sometimes coax readable data out of marginal sectors, but it’s a DOS-era tool with a modern price tag, and for most people a backup plus a replacement drive is the better spend.
What software can never fix
Be blunt with yourself here, because hope is how data gets lost:
- Clicking, grinding, or beeping sounds, the read/write heads or motor are failing.
- The drive doesn’t appear in BIOS at all, electronics or firmware failure.
- Smoke, burning smell, or extreme heat, power it off and don’t plug it in again.
- Bad sectors that multiply between scans, the physical surface is deteriorating.
None of these respond to software. What they respond to is a professional data-recovery lab with a clean room, typically $300 to $3,000 depending on the damage. That’s worth it for irreplaceable business records or a lifetime of photos; it isn’t worth it for a Steam library.
Getting your data back safely
The goal was never really “repair the drive”, it was rescue the data. So: diagnose with CrystalDiskInfo, fix logical errors with CHKDSK, recover lost partitions and files with TestDisk/PhotoRec, and the moment the evidence points to hardware failure, stop and either replace the drive or call a lab. Then set up backups so you never do this again, because every drive fails eventually; the only variable is whether you saw it coming.
If files are already deleted rather than the drive failing, our guide to recovering permanently deleted files in Windows is the narrower, deeper version of Method 3. If an external drive won’t show up at all, start with our external drive not mounting on Mac walkthrough, and if you’re deciding how the replacement drive should be formatted, ReFS vs NTFS covers the trade-offs.
Read next: How to Recover Permanently Deleted Files in Windows 11.

- How to Change the Lock Screen Timeout on Windows 11 - October 25, 2026
- How to Fix the Windows 11 Taskbar Auto-Hide Problem - October 24, 2026
- How to Fix a Laptop Camera Not Working in Windows 11 - October 23, 2026