
Yes, you can delete the System Reserved Partition in Windows, but you need to move its contents first. The System Reserved Partition holds critical boot files. If you delete it without moving these files, your computer won’t start. The safe way is to merge it into your main C: drive using built-in Windows tools or third-party disk management software.
Most people want to delete this partition to reclaim disk space or clean up their drive layout. This article shows you exactly how to do it without losing data or breaking your system.
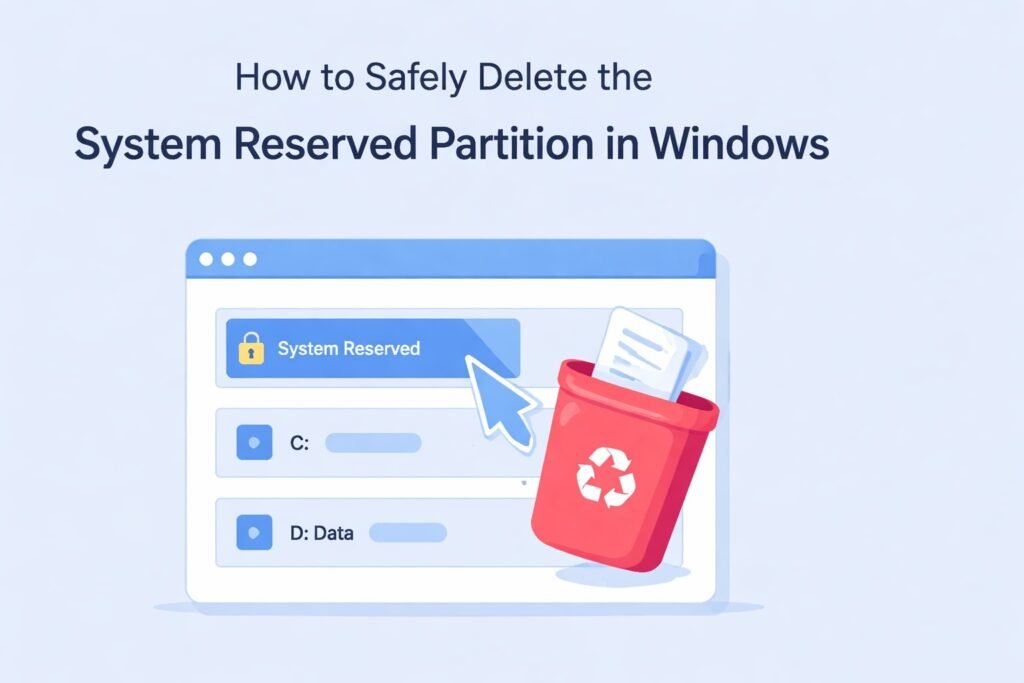
What Is the System Reserved Partition?
The System Reserved Partition is a small hidden partition created during Windows installation. It’s typically 100 MB to 550 MB in size, depending on your Windows version and when you installed it.
This partition contains:
- Boot configuration data
- Windows Recovery Environment files
- Boot manager files
- Sometimes BitLocker recovery keys
Windows uses these files to start your computer. Without them, your system can’t boot properly.
The partition is usually hidden, so you might not even know it exists. It appears as an unlabeled partition in disk management tools.
Why You Might Want to Delete It
Reclaiming disk space: On small drives, this partition wastes valuable storage.
Cleaning up drive layout: You might want a single partition instead of multiple ones.
Simplifying disk management: Fewer partitions mean less complexity.
Preparing for a fresh installation: You might want to start completely fresh.
Moving to a new drive: You don’t always need to copy this partition over.
However, you don’t actually need to delete it in most cases. The space it takes is minimal. But if you have a good reason and follow the steps carefully, you can remove it safely.
Before You Start: Critical Preparation
Back Up Your Data
Create a full backup of your system before making any partition changes. Use Windows Backup or a third-party tool like Macrium Reflect (free version available).
Go to Settings > System > About > Advanced system settings > System Protection > Create a restore point. This gives you a safety net.
Check Your Boot Configuration
You need to understand how your system currently boots. Windows can boot in two ways:
UEFI mode: Modern computers use this. The System Reserved Partition might be smaller or might not exist at all.
Legacy BIOS mode: Older systems use this. The System Reserved Partition is more important here.
To check which mode you use, press Windows Key + R, type msinfo32, and look for “BIOS Mode” in the System Information window.
If you’re using UEFI, deleting the System Reserved Partition is safer. If you’re using Legacy BIOS, it’s riskier but still possible with proper steps.
Disable BitLocker
If BitLocker encryption is enabled, disable it before making partition changes.
Press Windows Key + R, type manage-bpm.msc, and look for your drive. If you see a padlock icon, BitLocker is on.
To disable it: Right-click the encrypted drive and select “Turn off BitLocker.” Wait for the decryption process to complete. This can take several hours on large drives.
Method 1: Using Windows Built-In Tools
This method uses only tools that come with Windows. It’s slower but requires no additional software.
Step 1: Create a Windows Recovery Drive
You need a bootable USB drive to recover your system if something goes wrong.
- Insert a USB drive with at least 16 GB of space
- Press Windows Key + R and type recovery
- Select “Create a recovery drive”
- Follow the wizard
- Choose the USB drive and click Next
- The process takes 20 to 30 minutes
Keep this USB drive in a safe place.
Step 2: Open Disk Management
Press Windows Key + R, type diskmgmt.msc, and press Enter.
You’ll see all your partitions. Look for:
- System Reserved (100 MB to 550 MB, no drive letter assigned)
- Your main C: drive
- Any other partitions you have
If you don’t see the System Reserved Partition, it might be hidden. Right-click the disk and check for hidden partitions.
Step 3: Extend Your C: Drive
Before deleting the System Reserved Partition, you need to extend your main C: drive to include its space.
However, Windows Disk Management has a limitation. You can only extend a partition by merging unallocated space that comes directly after it. The System Reserved Partition usually comes before the C: drive, so you can’t directly extend C: into it.
You have two options:
Option A: Shrink, then extend: This is complex and risky.
Option B: Use a third-party tool: Much safer and easier.
For now, let’s continue with the conceptual steps. Third-party tools make this much easier and safer.
Step 4: Move Boot Files
This step is where things get technical. You’re essentially telling Windows to boot from your C: drive instead of the System Reserved Partition.
Open Command Prompt as Administrator:
- Press Windows Key + R
- Type cmd
- Press Ctrl + Shift + Enter
Type these commands one at a time:
bcdboot C:\Windows /s C: /f ALLThis command rebuilds the boot configuration on your C: drive. Wait for confirmation that it completed successfully.
Then type:
diskpartThis opens the Disk Partition utility. It’s powerful and can damage your system if used incorrectly. Proceed carefully.
Type:
list diskThis shows all your drives. Identify which disk number contains your System Reserved Partition. Let’s say it’s Disk 0.
Type:
select disk 0Type:
list partitionThis shows all partitions on Disk 0. The System Reserved Partition is usually very small. Note its partition number. Let’s say it’s Partition 1.
Type:
select partition 1Type:
delete partition overrideThis permanently deletes the partition. There’s no undo after this step.
Type:
exitThis closes Disk Partition.
Step 5: Extend Your C: Drive
Now the space from the deleted partition is unallocated. You can extend your C: drive into it.
Back in Disk Management:
- Right-click your C: drive
- Select “Extend Volume”
- Click Next
- The wizard shows the unallocated space
- Click Next again
- Click Finish
Your C: drive now includes the space from the deleted partition.
Method 2: Using Third-Party Disk Management Software
This method is safer and easier for most people. Third-party tools handle the complexities automatically.
Best Tools for This Task
AOMEI Partition Assistant: Free version works well. Can move partitions and delete System Reserved Partition safely. Download from the official AOMEI website.
MiniTool Partition Wizard: Free version has most features you need. Intuitive interface. Available on MiniTool’s official site.
EaseUS Partition Master: Good free version. Clear step-by-step guidance.
We’ll use AOMEI Partition Assistant as an example because it’s genuinely free with no hidden limitations.
Step 1: Download and Install
- Go to the AOMEI website
- Download the free version
- Run the installer
- Follow the installation steps
- Launch the program
Step 2: Create a Bootable USB Backup
AOMEI has a built-in feature for this:
- Click “Tools” in the main menu
- Select “Create Bootable Media”
- Choose USB flash drive
- Click Proceed
- Insert a USB drive when prompted
- Wait for completion
This creates a rescue disk you can boot from if needed.
Step 3: Identify Your Partitions
The main window shows all your partitions. Look for:
- System Reserved Partition (small, no drive letter)
- Your C: drive
- Other partitions if present
Right-click the System Reserved Partition to see its properties.
Step 4: Delete the Partition
- Right-click the System Reserved Partition
- Select “Delete Partition”
- A confirmation dialog appears
- Click “Delete”
- The partition now shows as “Unallocated”
The deletion is only marked in the program’s queue at this point. It hasn’t happened to your actual disk yet.
Step 5: Extend Your C: Drive
- Right-click your C: drive
- Select “Extend Partition”
- Drag the slider to include the unallocated space
- Or type the specific amount
- Click OK
Step 6: Apply Changes
This is critical. Nothing actually happens until you apply changes.
- Click “Apply” in the top toolbar
- A confirmation dialog appears
- Read it carefully
- Click “Yes” to confirm
- The program might require a restart
- Your changes apply after restart
The process takes a few minutes. Don’t interrupt it.
Step 7: Verify Your Boot
After the process completes and you restart:
- Check that Windows boots normally
- Open Disk Management and verify the partition is gone
- Confirm your C: drive has the extra space
- Run System File Checker to verify integrity: Press Windows Key + R, type cmd, right-click and select “Run as Administrator,” then type sfc /scannow
Potential Issues and How to Fix Them
Your Computer Won’t Start
This is the worst-case scenario, but it’s fixable.
- Insert the Windows Recovery USB drive you created
- Turn on your computer
- Press the boot menu key (F12, F2, Esc, or Del depending on your computer brand)
- Select the USB drive
- Windows Recovery Environment boots
- Click “Troubleshoot”
- Click “Advanced Options”
- Click “Startup Repair”
Let it run. This usually fixes boot issues caused by partition changes.
If Startup Repair doesn’t work:
- Go back to Advanced Options
- Click “Command Prompt”
- Type: bootrec /fixmbr
- Type: bootrec /fixboot
- Type: bootrec /rebuildbcd
- Restart your computer
If you still can’t boot, you have the recovery USB. You can reinstall Windows without losing your data by using the USB to boot and selecting a repair installation.
Disk Space Doesn’t Increase
If your C: drive didn’t expand:
- Open Disk Management again
- Verify the partition is actually deleted
- Right-click C: drive again
- Select Extend Volume
- Make sure unallocated space appears in the wizard
- Complete the extension
If unallocated space doesn’t appear, restart your computer and try again.
System Runs Slowly After Changes
Disk changes can sometimes affect performance temporarily. Run Disk Defragmentation:
- Press Windows Key + R
- Type dfrag.msc
- Select your drives
- Click “Optimize”
Wait for completion. Performance usually returns to normal.
When You Shouldn’t Delete the System Reserved Partition
You Use Legacy BIOS Mode
If your system uses Legacy BIOS instead of UEFI, the System Reserved Partition is more critical. Deleting it is riskier. Only proceed if you’re very comfortable with technical troubleshooting.
You Have BitLocker Encryption
If BitLocker is enabled and you can’t disable it properly, don’t proceed. BitLocker recovery keys are often stored on the System Reserved Partition. Deleting it could lock you out of your data.
You Use a Dual Boot Setup
If you have multiple operating systems, the System Reserved Partition might contain boot files for both. Deleting it could prevent other systems from booting. Only proceed if you’re the one who set up the dual boot and understand it completely.
You Have Limited Technical Knowledge
Partition changes are rarely necessary. The System Reserved Partition uses minimal space. If you’re not confident, leave it alone. It’s simply not worth the risk.
Important Safety Considerations
Always Have a Backup
Create a complete system image before starting. Use Windows Backup, Macrium Reflect, or your manufacturer’s backup tool.
Test the backup by booting from it. If you ever need it, you’ll be glad you did.
Do This When You Have Time
Don’t rush. Set aside 2 to 3 hours when you’re not doing important work. Power outages or interruptions during partition changes can corrupt your system.
Disable Antivirus Temporarily
Some antivirus software interferes with partition changes. Temporarily disable it during this process. Re-enable it afterward.
Use a Stable Power Supply
If you’re on a laptop, plug it in and use it while plugged in. A dying battery during partition changes is disastrous.
Connect your computer directly to the power outlet. Avoid power strips if possible.
Take Photos of Your Disk Layout
Before making changes, take screenshots of Disk Management showing your current partitions. If something goes wrong, this helps you understand what happened.
When Deleting the System Reserved Partition Actually Makes Sense
You’re Upgrading Your System Drive
If you’re moving from an old drive to a new one, you don’t need to copy the System Reserved Partition. Just install Windows fresh on the new drive.
You’re Recovering Disk Space on a Small Drive
On drives smaller than 256 GB, 500 MB can be meaningful. If you have less than 10 GB free, recovering this space helps.
You’re Consolidating Partitions
If you have multiple partitions and want a single C: drive for simplicity, deleting System Reserved and extending C: is reasonable.
You’re Starting Fresh with a Clean Install
If you’re planning a clean Windows installation anyway, you can ignore this partition entirely. The new installation creates its own boot configuration.
Methods and Their Tradeoffs
| Factor | Built-In Tools | Third-Party Software |
|---|---|---|
| Cost | Free | Free (basic version) |
| Difficulty | High | Low |
| Speed | Slower | Faster |
| Safety | Moderate | High |
| Support Available | Limited | Good |
| Technical Skill Required | Advanced | Basic |
| Risk of Data Loss | Moderate | Low |
| Automation | No | Yes |
Step-by-Step Summary
- Back up your entire system
- Create a Windows Recovery USB drive
- Check your boot mode (UEFI or BIOS)
- Disable BitLocker if enabled
- Download third-party software (recommended) or use built-in tools
- Identify the System Reserved Partition
- Delete the System Reserved Partition
- Extend your C: drive into the freed space
- Apply changes and restart
- Verify Windows boots normally
- Confirm your C: drive has the additional space
Conclusion
You can safely delete the System Reserved Partition if you follow the correct steps. The safest approach is using third-party disk management software like AOMEI Partition Assistant. These tools handle the technical complexities and reduce the risk of errors.
However, honestly assess whether you actually need to do this. The partition uses minimal space. Most people are better off leaving it alone. Only delete it if you have specific reasons like limited disk space or consolidating partitions.
Always create a full backup and recovery drive before starting. Take your time. Don’t rush the process. If something goes wrong, you can use the recovery drive to get back to a working state.
The knowledge you gain from understanding your system’s boot configuration is valuable regardless of whether you ultimately delete the partition. Understanding how Windows boots helps you troubleshoot issues and make better decisions about your system.
If at any point you feel unsure, stop and ask for help. Partition changes are permanent. A few hours of research or asking a knowledgeable person is worth avoiding days of recovery work.
Frequently Asked Questions
Can I recover a deleted System Reserved Partition?
Yes, if you catch it immediately. Open your third-party tool before restarting and undo the changes. If you’ve already restarted, you can use data recovery software like EaseUS Data Recovery to attempt recovery. However, recovery isn’t guaranteed. This is why backups are essential.
Will deleting this partition void my warranty?
No. Partition modifications don’t void warranties. However, if you damage your system and need warranty service, they might reinstall Windows on your drive, which would recreate the partition.
How much disk space will I actually gain?
Between 100 MB and 550 MB depending on your Windows version. On modern systems with larger drives, this is usually less than 1% of your total storage.
Is my data on the System Reserved Partition?
No. Your documents, files, and applications are on your C: drive. The System Reserved Partition contains only boot files and recovery data. Deleting it doesn’t affect your personal files.
Can I undo the deletion after restarting?
Not easily. This is why making a full system backup before you start is critical. If you need to undo it, you’d need to restore from your backup or reinstall Windows. A backup from before the deletion allows you to restore everything to its previous state.

- How to Clear Cache on Windows 11: Quick Guide in 2026 - February 23, 2026
- Top 10 Trending AI Apps in 2026 You Should Actually Be Using - February 22, 2026
- Top 10 AI Based Resume Makers in 2026 That Actually Get You Hired - February 22, 2026