
On a laptop, the fastest way to adjust brightness on Windows 11 is to press Windows + A and drag the Brightness slider in Quick Settings. The same slider lives in Settings under System and then Display, and most laptops also have brightness keys on the keyboard.
A desktop PC with a separate monitor is different. Windows shows no brightness slider for that screen at all, so you change it on the monitor itself or with a small tool on your PC. This guide is organised by the screen in front of you, so you can jump straight to the method that fits and skip the rest.
Which method fits your screen
Brightness controls in Windows only work on screens Windows can drive directly. That is why the same steps work on a laptop and fail on a desktop with a separate monitor. Find your setup in this table first, then go to that section.
| Your screen | Use this | Where it is |
|---|---|---|
| Laptop, tablet, or 2-in-1 with a built-in screen | Quick Settings slider | Windows + A, or the network, volume, and battery icons |
| Same screen, and you want the automatic options too | Settings app | Settings, then System, then Display |
| Laptop with sun keys on the keyboard | Brightness keys | Top row, often used with Fn |
| Desktop PC or a separate monitor | Monitor controls or a DDC/CI tool | Buttons on the monitor, or PowerToys Power Display |
1. Use the Quick Settings slider
This is the quickest route on a laptop, a tablet, or a 2-in-1, and it is the one most people should learn first. It takes a few seconds and needs no trip into Settings.
- Press Windows + A, or select the network, volume, or battery icon at the right end of the taskbar. The Quick Settings panel opens above the taskbar.
- Find the Brightness slider. It sits below the tiles and has a sun icon beside it. The volume slider sits next to it, so check the icon before you drag.
- Drag the slider left to dim the screen or right to brighten it. The change happens at once, and Windows keeps the level when you close the panel.
- Click anywhere outside the panel, or press Esc, to close it.
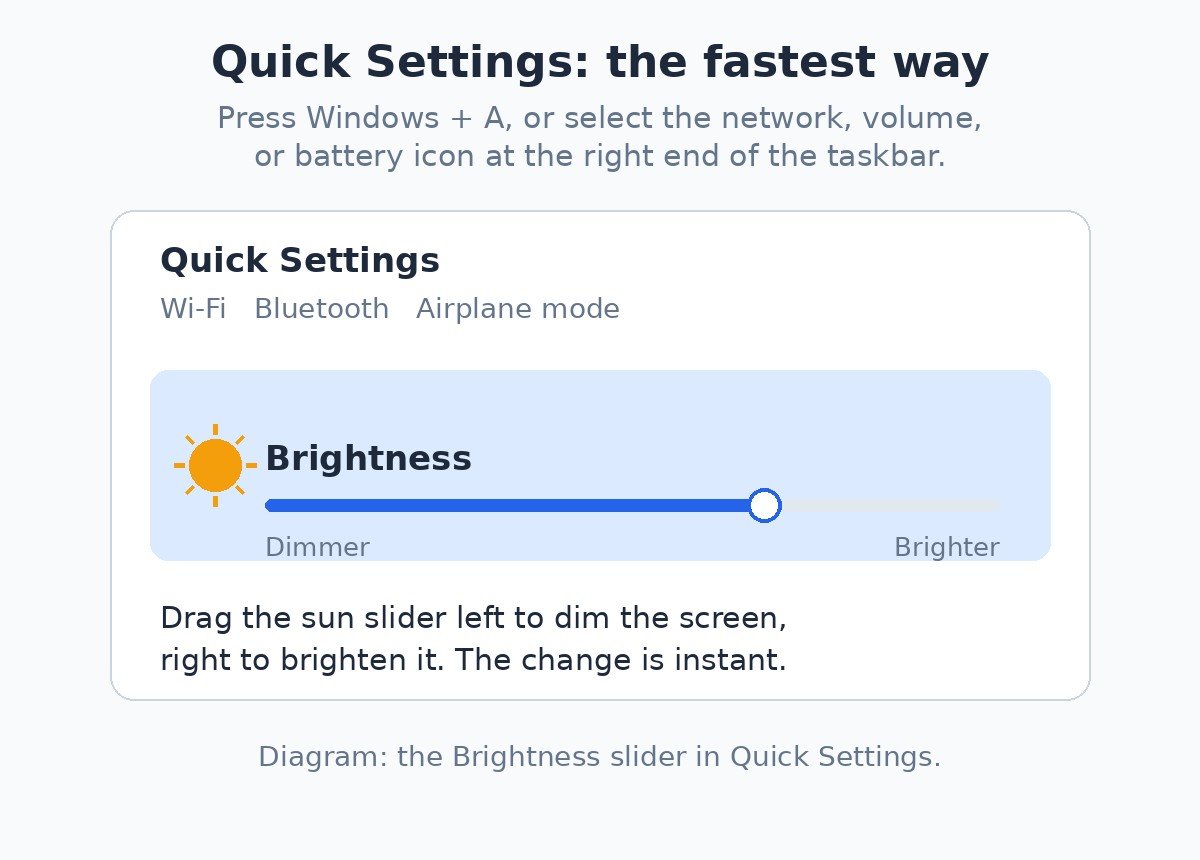
If the panel shows a volume slider but no brightness slider, Windows is not controlling the screen you are looking at. On a desktop with a separate monitor that is expected, and the monitor section below has the answer. On a laptop it usually points to a driver problem, covered in the missing slider section near the end.
2. Change brightness in Settings
The Settings app gives you the same slider, plus the automatic brightness options that Quick Settings does not show. Use this route when you want to check those options at the same time.
- Press Windows + I to open Settings. You can also select Start, then Settings.
- Select System in the left pane, then select Display.
- Under Brightness, drag the Brightness slider. The screen changes as you drag, and there is nothing to save.
- Select the small arrow at the end of the Brightness row to open the automatic brightness options.
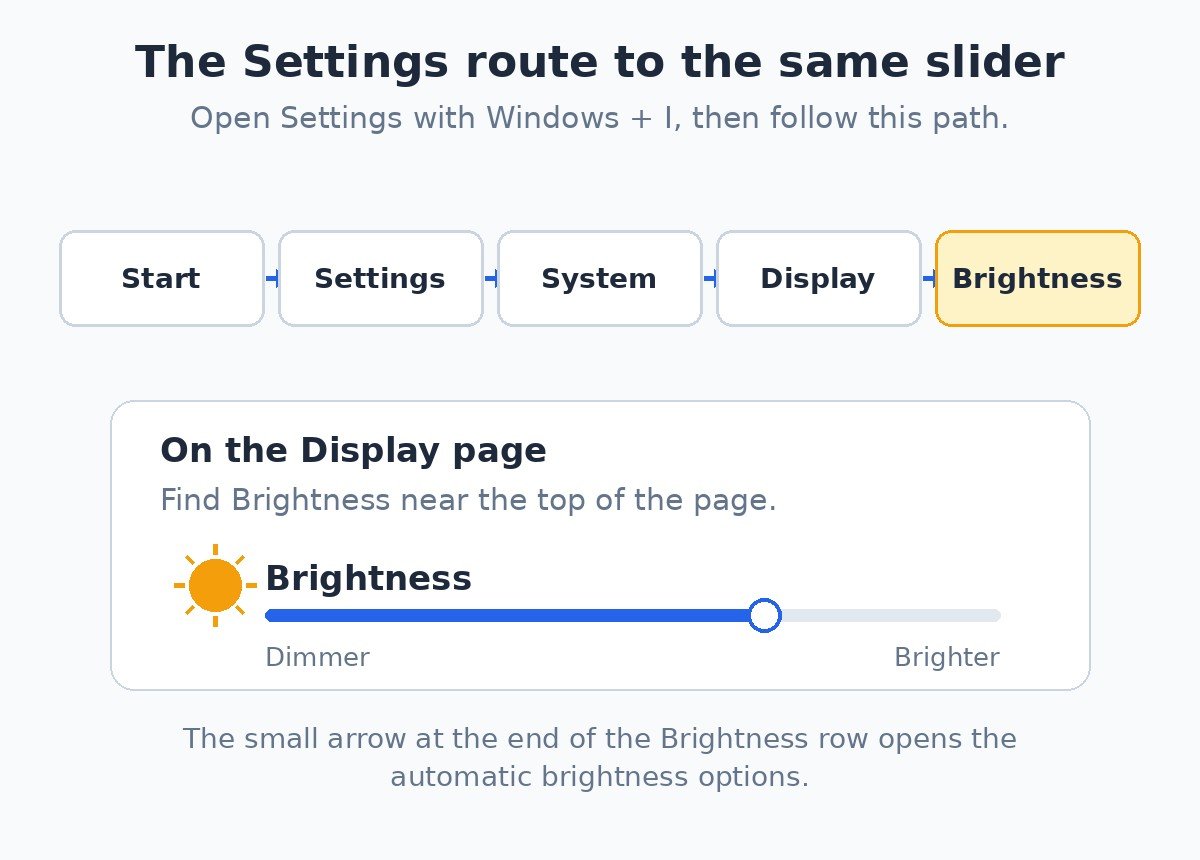
If more than one display is connected, select the display at the top of the Display page first, then adjust its slider. The change applies at once, and Windows keeps the level without a Save button. On an HDR display, automatic brightness changes can take a little longer, because Windows tunes the adjustment to how the eye sees brightness on those screens. Microsoft’s own guide to changing display brightness and color in Windows lists the same path, which is a useful check if a label on your PC looks different.
3. Use the brightness keys on your laptop keyboard
Most laptop keyboards have two keys marked with a small sun and a large sun, usually in the top row among the F1 to F12 keys, or on the arrow keys. Press the small sun to dim the screen and the large sun to brighten it. Each press moves brightness a small step, and a brightness bar usually appears on screen while you press.
- If pressing the key does something else, such as opening a search or refreshing a page, hold Fn at the same time. On many laptops the brightness keys share the F keys, and Fn decides which job the key does.
- There is no built-in Windows shortcut that raises or lowers brightness by a set amount. Windows + A followed by the slider is the quickest keyboard route on a PC without brightness keys.
- If the keys do nothing at all, the cause is usually a missing or outdated display driver, or the laptop maker’s hotkey software. The missing slider section below covers the driver check.
On a tablet or a 2-in-1 with no keyboard attached, the brightness keys do not exist, so Quick Settings is the route to use. The slider works the same way by touch as it does with a mouse.
4. Use Windows Mobility Center on a laptop
Windows Mobility Center is a small panel that puts brightness, volume, and battery controls in one place. It is an older part of Windows, but it still works on current Windows 11 laptops.
- Press Windows + X, or right-click the Start button, and select Mobility Center.
- Drag the Display brightness slider to the level you want.
- Close the panel. The new level stays in place.
Mobility Center only appears on laptops and tablets. If it is missing from the Win + X menu on a laptop, the maker may have removed it, in which case Quick Settings does the same job.
5. Brightness on a desktop PC or an external monitor
This is the case most guides handle badly, so here it is plainly: if your screen is a separate monitor plugged into a desktop PC, Windows has no brightness slider for it. Microsoft says the same thing in its own brightness guide. The screen’s brightness lives in the monitor, not in Windows, so you change it there.
Three routes work, in order of simplicity.
- Monitor buttons. Use the buttons or the small joystick on the monitor, usually on the bottom edge, the right side, or the back. Open the on-screen menu and look for Brightness, often under Picture or Display. The buttons feel fiddly the first time, but they control the real backlight, which is what you want.
- Maker’s control app. Most monitor makers offer a free app that adjusts their own screens from your PC, such as Dell Display Manager or LG OnScreen Control. Check your monitor maker’s support page for the app that matches your model. This is the easiest option if you change brightness often and hate reaching for the buttons.
- PowerToys Power Display. Microsoft’s free PowerToys app includes Power Display, which talks to external monitors over DDC/CI and puts a brightness slider for each monitor in one flyout. It can link several monitors to a single slider. Microsoft’s Power Display documentation explains the setup. PowerToys asks you to confirm before turning the feature on, because the monitor control channel it uses can be unreliable on some screens.
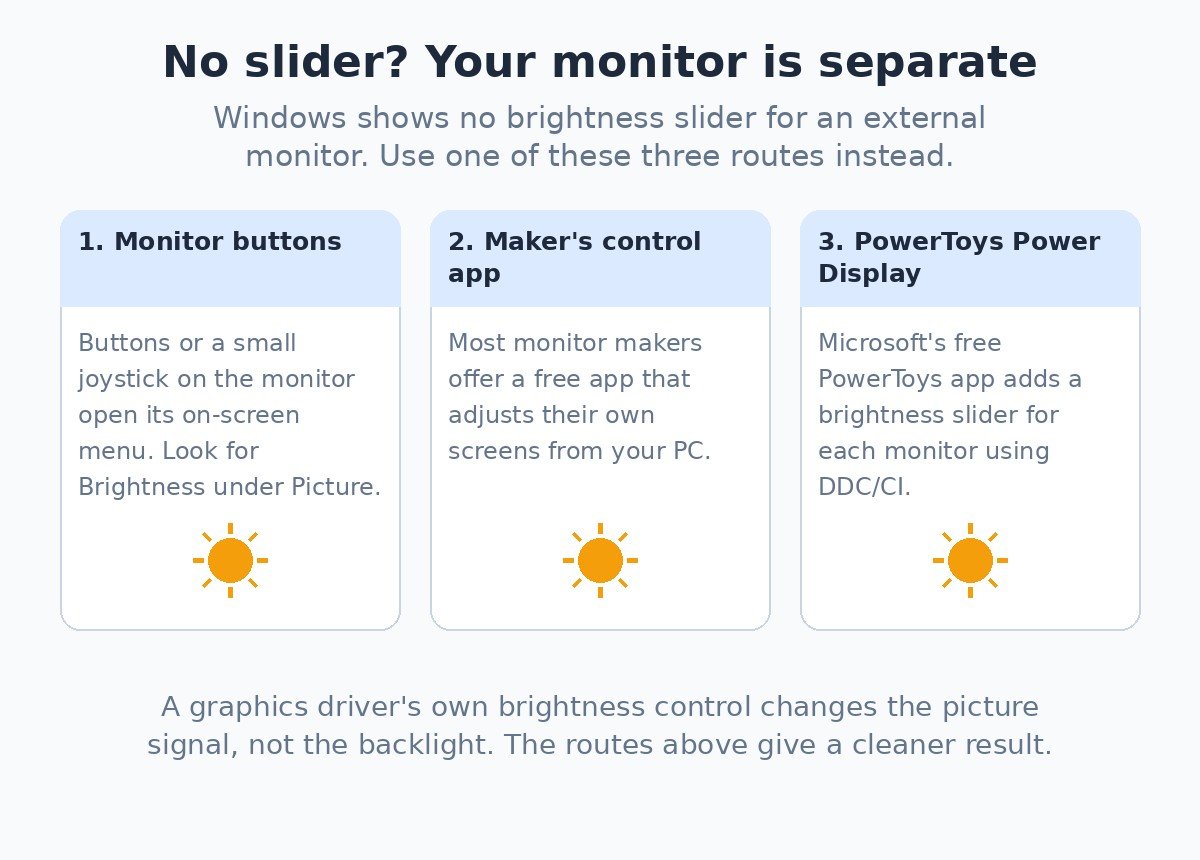
One route to avoid: the brightness control in your graphics driver’s own panel, such as NVIDIA Control Panel or AMD Software. That setting changes the picture signal Windows sends, not the monitor’s backlight, so colours can look washed out. The routes above control the backlight itself and give a cleaner result.
If you use a laptop with a second monitor attached, remember the split. The Windows slider controls the laptop’s own screen only. The separate monitor still needs its buttons, its maker app, or PowerToys.
One more check if you try Power Display and a monitor does not show up: open the monitor’s own on-screen menu and look for a DDC/CI setting, since some monitors ship with it switched off. PowerToys also has a Max compatibility mode for monitors it cannot find by the usual route, but that mode probes the monitor more deeply and can briefly blank the screen, so only use it when a monitor is genuinely missing from the list.
When brightness keeps changing on its own
If you set a level and the screen keeps drifting brighter or darker, one of two automatic features is doing it. They sit in the same place: Settings, then System, then Display, then select the arrow at the end of the Brightness row.
- Change brightness automatically when lighting changes. This uses a light sensor in the PC to match the room. It only appears on PCs that have a sensor.
- Change brightness based on content. This is content adaptive brightness control, and it shifts brightness and contrast to match what is on screen, such as a dark video scene. The drop-down offers three choices.
| Setting | What it does |
|---|---|
| Off | Brightness and contrast stay where you set them |
| Always | Brightness and contrast shift with the content, plugged in or on battery |
| On Battery Only | Brightness and contrast shift only while the laptop runs on battery |
Turning either feature off stops the drifting, and the full walkthrough lives in our guide to stopping your laptop screen from dimming on its own. That guide owns this topic, so this section stays short on purpose.
Brightness is not the same as Night Light
Night Light makes the screen’s colours warmer to cut blue light in the evening. It does not make the screen dimmer, and turning it on will not help a screen that is too bright. If your screen looks orange at night, that is Night Light doing its job. You control it separately at Settings, then System, then Display, then Night Light, where a Strength slider sets how warm the colours get. Brightness and Night Light solve different problems, so check which one you are actually looking at before changing settings.
If the brightness slider is missing or greyed out
A missing slider has a short list of usual causes, and they are worth telling apart before you start fixing anything.
- You are looking at a separate monitor. Windows never shows a slider for one, and that is normal. Use the monitor section above.
- The display driver is missing or outdated. This often follows a Windows update or a clean install. Updating the driver from your PC maker’s support page, or from the graphics chip maker’s page, is the usual fix.
- The brightness keys do nothing and the slider is gone at the same time. That combination usually points at the driver too, or at the laptop maker’s hotkey software.
Before opening the full fix guide, two quick checks rule out the simple causes. Restart the PC, since a stuck display driver sometimes recovers with a restart, and check Windows Update for a pending driver update. If the slider is still missing after both, the guide below walks through the rest.
The step-by-step fix for each cause lives in our guide to fixing a missing brightness slider, which walks through the driver check and the other repairs in order.
What brightness level should you use?
There is no single right number, because the right level depends on the room. A level near the middle of the slider suits most indoor rooms. Raise it when you sit near a bright window or work outdoors, and lower it in a dark room or at night. If the screen still feels harsh after lowering brightness, look at glare as well: a lamp or window reflected in the screen causes as much strain as brightness itself. Lower brightness also stretches laptop battery life, since the screen is one of the biggest drains on the battery, so dimming it a little is the simplest way to gain extra time away from the charger.
Most brightness problems on Windows 11 come down to using the wrong control for the screen in front of you. Quick Settings handles a laptop in seconds, Settings covers the same job with the automatic options beside it, and a separate monitor needs its own buttons or a small tool. Once you know which of those fits your setup, the slider stops being a hunt and becomes a habit.

- How to Adjust Brightness on Windows 11 - November 20, 2026
- How to Turn Off Sensitive Content Warning on iPhone - November 18, 2026
- How to Turn Off Voice Access in Windows 11 - November 17, 2026