
Check In is the iPhone safety feature in Messages that tells a chosen person you arrived safely, or alerts them if you do not. It arrived with iOS 17, in two forms: a travel Check In that watches your journey, and a timer Check In that counts down for a set period. Turning it off is confusing because there is no single switch labelled Check In. Most people who search for how to turn off Check In on iPhone mean one of three different things, each with its own control in a different place. This guide covers all three, plus what happens if the phone dies or goes offline during a Check In, and why Check In sometimes refuses to work. The steps follow the paths Apple documents for iOS 17 and later, current as of November 2026.
First, work out which “turn off” you mean
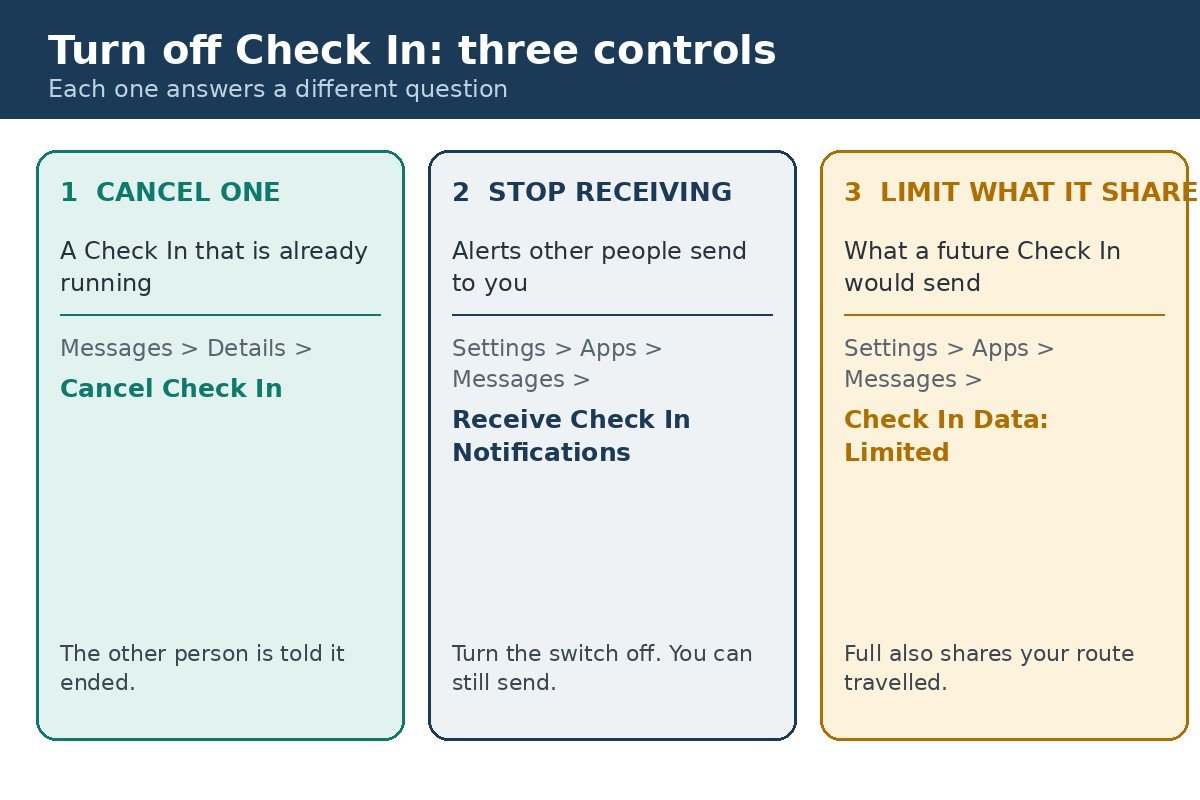
Before you tap anything, match your situation to the table below. Picking the wrong control is the reason most turn-off attempts seem to fail. Cancelling a Check In that is already running does nothing about the next one, and changing your data sharing does nothing about alerts other people send.
| What you want | The control to use | Where to find it |
|---|---|---|
| Stop one Check In that is already running | Cancel Check In | Messages, in the conversation, on the Check In message |
| Stop getting Check In alerts from other people | Receive Check In Notifications | Settings, Apps, Messages |
| Limit what a future Check In would share | Check In Data: Limited | Settings, Apps, Messages, Check In Data |
One more thing before you start: Check In only works over iMessage, between iPhones that both run iOS 17 or later. If the conversation shows green bubbles, it is SMS, MMS, or RCS, and Check In is not available there. Both people also need to be signed in to their own Apple Account with two-factor authentication turned on.
Cancel a Check In that is already running
This is the fix for a Check In you already sent. Maybe your plans changed, you arrived early, or you started a timer you do not need. Cancelling ends the session at once, and the other person is told it ended. The shared journey details are deleted when a session is cancelled, so nobody can open them afterwards.
- Open the Messages app on your iPhone.
- Open the conversation with the person you sent the Check In to.
- On the Check In message, tap Details.
- Tap Cancel Check In, then confirm when asked.
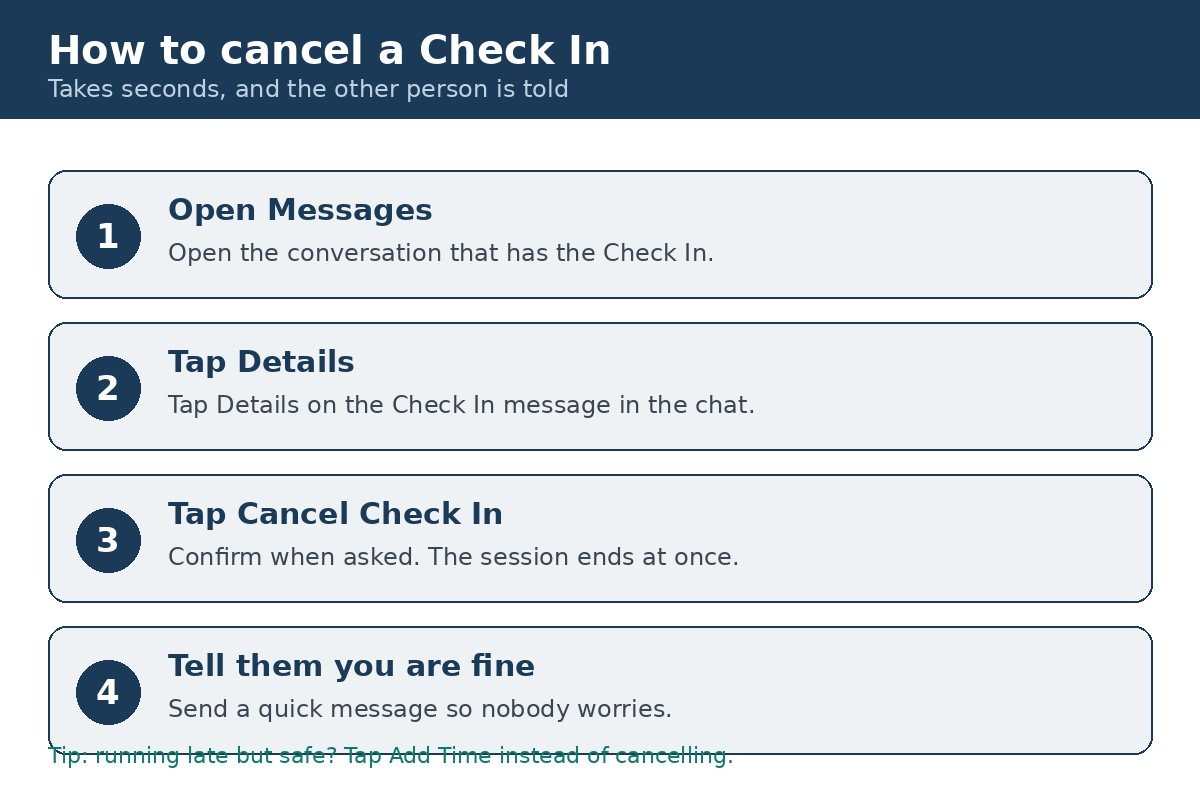
Apple documents this exact path in its guide to using Check In on iPhone. A travel Check In also ends on its own when you arrive, and a timer Check In ends when you tap End Check In before time runs out.
Cancelling needs your iPhone unlocked. If you tap the Check In notice on the Lock Screen, the phone asks you to unlock before it lets you cancel or add time. That is deliberate, so nobody holding your locked phone can quietly end a Check In for you. If you cancelled because of a false alarm, send the other person a quick message or call them, so they know you are fine.
Running late but safe is the one case where cancelling is the wrong move. Use Add Time instead, from the same Details screen. At the end of a timer, the phone offers extra time in chunks of 15, 30, or 60 minutes, and your friend sees the new end time.
Stop receiving Check In alerts from other people
This is the fix when you are the recipient, not the sender. A parent, partner, or friend sends you a Check In every time they drive somewhere, and your phone buzzes with arrival notices you did not ask for. Turning this off stops those notifications. It does not stop the other person sending Check Ins, and it does not stop you sending your own when you want to.
- Open Settings on your iPhone.
- Tap Apps, then tap Messages. On iOS 17, Messages sits in the main Settings list instead of under Apps, so tap Messages directly from there.
- Find Receive Check In Notifications and set the switch to Off.
- Go back to the Home Screen. The change takes effect straight away, with no restart needed.
Think carefully before switching this off, because it is a safety feature for the other person as well as for you. If someone sends you a Check In because they are walking home late or meeting a stranger, your phone is their safety net. With notifications off, you will not be told if they fail to arrive. A gentler option is to leave the switch on and ask the sender to use Check In only for journeys that actually worry you.
Limit what your Check In would share if it ran out
This is the privacy control, and it is the one the use-guides usually bury at the bottom. Check In shares nothing with the other person while it is running normally. Sharing only happens if the Check In does not end as expected: you do not arrive, you are badly delayed and do not answer the prompt, you do not respond at the end of a timer, or you make an Emergency SOS call and do not answer the follow-up prompt. At that point your contact is sent a link to view the details you chose in advance.
- Open Settings, then tap Apps, then tap Messages. On iOS 17, tap Messages in the main Settings list.
- Scroll down and tap Check In Data.
- Choose Limited or Full. The choice applies to future Check Ins, and you can change it again at any time.
| Detail shared if a Check In runs out | Limited | Full |
|---|---|---|
| Current location | Yes | Yes |
| Battery level, iPhone and Apple Watch | Yes | Yes |
| Network and cellular signal | Yes | Yes |
| Route you travelled | No | Yes |
| Last place you unlocked your iPhone | No | Yes |
| When you last removed your Apple Watch | No | Yes |
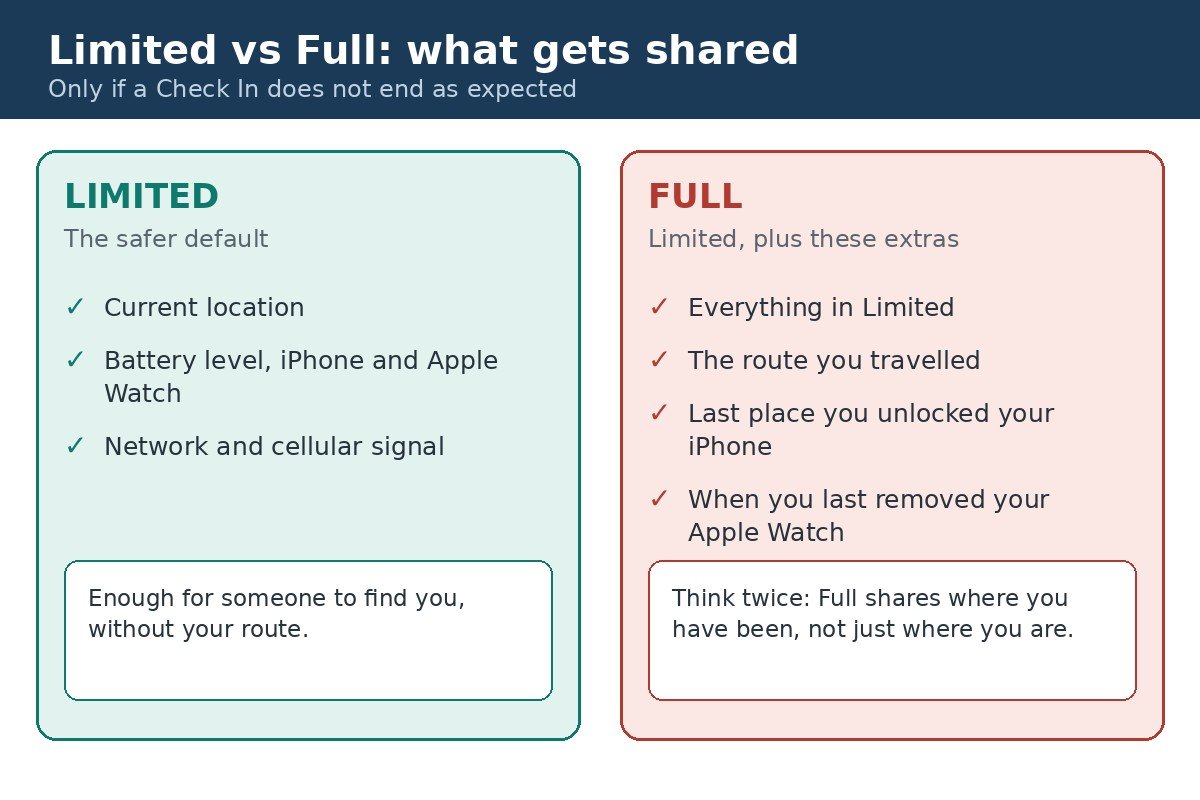
Limited is the right choice for most people. It gives the other person your current location, your battery level, and your signal strength, which is what they need to find you or decide whether your phone simply ran out of charge. Full adds the route you travelled and the last place you unlocked your iPhone or removed your Apple Watch. That extra detail can help in a genuine emergency, because it shows where you have been, not just where you are now. Changing the setting does not affect a Check In that is already running, so set it before you send the next one. The data is encrypted, and Apple states it cannot read the journey details itself.
What happens if the phone dies, goes offline, or you call for help
Apple is clear about it. If you start a Check In and then lose service or your iPhone powers off, your recipient may get a delayed or early notification, and they may be given the option to view the details you shared. The phone keeps sending small heartbeat signals to Apple servers while a Check In runs, and if those heartbeats stop because the phone is off or out of coverage, the servers release the stored details to your contact once enough time has passed. A dead battery looks the same to the system as a phone that stopped moving, so the alert goes out either way.
The same logic applies if your phone is lost while a Check In is running. Apple notes that your contact receives notifications as if you were not responding, which is exactly the situation Check In exists for. With Limited chosen, the contact sees your last location, battery, and signal, and nothing about your route. If the phone simply ran out of charge, charge it, cancel the Check In, and message the recipient so they know the alert was a false alarm.
An Emergency SOS call during a Check In is a separate trigger. If you call for help and then do not answer the follow-up Check In prompt, your contact is sent the shared details. Apple explains all four triggers, the data levels, and the lost-phone case in its Personal Safety guide to Check In. Safety alerts and emergency calls sit close together on an iPhone, so if you are reviewing what your phone does in an emergency, our guide to turning off Emergency Alerts on iPhone covers the other alert switch worth knowing about. Do not turn emergency alerts off casually: unlike Check In, those alerts can carry warnings about severe weather and public safety in your area.
If Check In is missing, greyed out, or will not cancel
- Check In is missing from the plus menu. Tap More, or swipe up on the app list, because Check In often sits below the first few options. If it is still missing, update to iOS 17 or later under Settings, General, Software Update.
- Check In is greyed out or will not send. The conversation is probably SMS, MMS, or RCS, shown by green bubbles, or the other person is on an older iOS version. Check In only works over iMessage, so ask them to update and turn iMessage on.
- The other person never gets the arrival notice. Both iPhones need iOS 17 or later, and both people need to be signed in to their own Apple Account with two-factor authentication turned on. Location sharing is not supported in South Korea and may be unavailable in some other regions.
- Cancel Check In does nothing. Make sure the phone is unlocked first, then try again from the conversation in Messages, not from a notification preview. If the Check In already ended, either because you arrived or the timer ran out, there is nothing left to cancel.
- The setting switch is not where the guide says it is. On iOS 17, Messages lives in the main Settings list. From iOS 18 onwards, it moved under Settings, then Apps, then Messages. Check your version under Settings, General, About, and use the path for your version.
If none of those fixes it, restart the iPhone and check for a software update. Check In depends on Messages, iMessage, and Location Services working together, so a restart clears temporary faults that block one of them.
Turning off Check In is really three small jobs. Cancel it in Messages when a single session needs to end, switch off Receive Check In Notifications in Settings when other people’s alerts are the problem, and choose Limited under Check In Data when you want future Check Ins to share less. Set the data level before your next trip, and remember that a cancelled Check In always tells the other person it ended, so a quick message to say you are fine is the kindest way to finish.

- How to Turn Off Check In on iPhone - November 18, 2026
- How to Factory Reset Windows 11 - November 17, 2026
- Turn Off Finish Setting Up Your Device in Windows 11 - November 16, 2026