
Windows 11 has more than one way to take a screenshot, and the right one depends on what you want to capture and whether you want a file or something to paste. The fastest method for most people is Windows key + Shift + S. It opens the Snipping Tool overlay, lets you drag around exactly the part of the screen you need, and copies the result to the clipboard so you can paste it into a chat, a document, or an image editor. If you want a file saved automatically instead, press Windows key + Print Screen. The screen dims for a moment and a PNG file appears in Pictures, then Screenshots. The steps below follow Microsoft’s own documentation for Windows 11, current as of November 2026.
Pick the right method in seconds
Two ideas in that table cause most of the confusion around screenshots. First, clipboard and file are different destinations. A capture that goes to the clipboard exists only in memory until you paste it with Ctrl + V, and taking another screenshot replaces it. A capture that saves as a file is already on your disk and stays there. Second, the Print Screen key behaves differently depending on a setting, which the next sections explain.
| Method | What it captures | Where it goes | Best for |
|---|---|---|---|
| Windows key + Shift + S | Part of a screen, a window, or full screen | Clipboard; Snipping Tool to edit and save | Precise captures to paste or mark up |
| Windows key + Print Screen | The whole screen | Pictures, Screenshots, PNG file | Full-screen shots without pasting |
| Print Screen alone | The whole screen | Clipboard, or Snipping Tool if the setting is on | A fast copy to paste elsewhere |
| Alt + Print Screen | Only the active window | Clipboard only | One app window without the desktop |
| Windows key + Alt + Print Screen | The active game or app | Videos, Captures, PNG file | Games and apps through Xbox Game Bar |
| Snipping Tool app | Any of the four snip types, with a delay | Screenshots folder, editing built in | Menus, pop-ups, and shots that need editing |
Capture part of the screen with Windows key + Shift + S
This is the method to learn first. It works on any Windows 11 keyboard, it needs no Print Screen key, and it captures exactly the area you choose instead of the whole desktop.
- Open the window, page, or document you want to capture.
- Press Windows key + Shift + S. The screen dims and a small toolbar appears at the top.
- Choose a capture mode: rectangular, freeform, window, or full screen.
- For a rectangular or freeform snip, drag around the area you want. For a window snip, click the window.
- The capture is copied to the clipboard, and a small notification appears at the lower right. Click it to open the capture in the Snipping Tool editor, where you can crop it, draw on it, or copy text out of it with the Text actions button.
- To keep the capture as a file, save it from the editor with Ctrl + S, or choose Save as and pick a location and a file name.
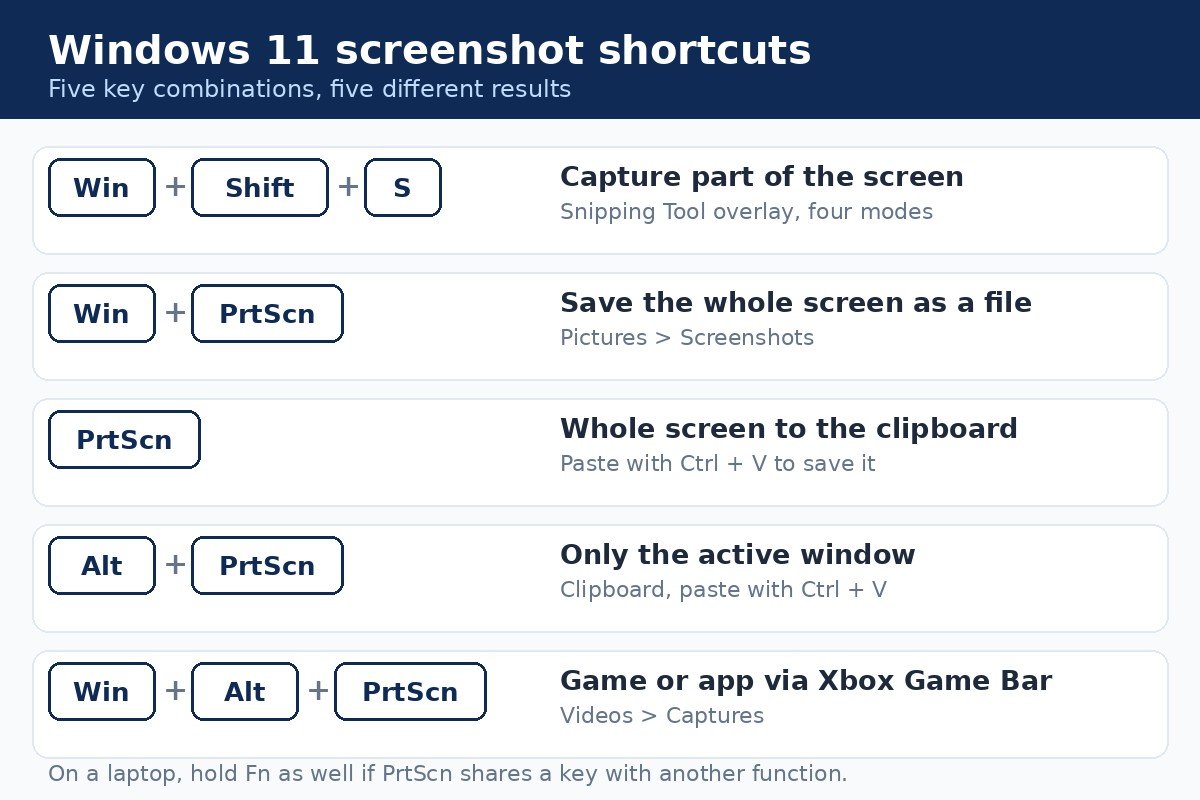
The four modes cover nearly every everyday need. Rectangular suits a section of a web page or a part of a document. Window suits a single app or dialog box without the taskbar and desktop behind it. Full screen suits a complete view of the desktop, for example when you are showing someone an error message with everything around it. Microsoft’s Snipping Tool guide lists the same four modes, plus a video snip. If you press Windows key + Shift + R instead of S, you get the video version of the same overlay.
One detail catches people out. Snipping Tool now saves each capture to your Screenshots folder automatically, so a snip made with Windows key + Shift + S may already exist as a file even though you never pressed save. You can change that in the Snipping Tool settings, under the See more menu.
Save the whole screen as a file with Windows key + Print Screen
When you want a file of the whole screen, this is the simplest shortcut. Press Windows key + Print Screen together. The screen dims briefly, and Windows saves a PNG file in File Explorer, under Pictures, then Screenshots. You do not need to paste anything or open an editor first.
Pressing Print Screen on its own is a different action, and it is the one that confuses people most. On current Windows 11, pressing Print Screen alone usually opens the same Snipping Tool overlay as Windows key + Shift + S. When the setting below is switched off, it copies the whole screen to the clipboard instead, and nothing visible happens at all. Both behaviors are normal. They depend on one switch: open Settings, then Accessibility, then Keyboard, and look for the option labelled “Use the Print screen key to open Snipping Tool”. Turn it on to open the overlay, or turn it off to copy the screen to the clipboard. Microsoft documents the same setting on its keyboard shortcut for print screen page.
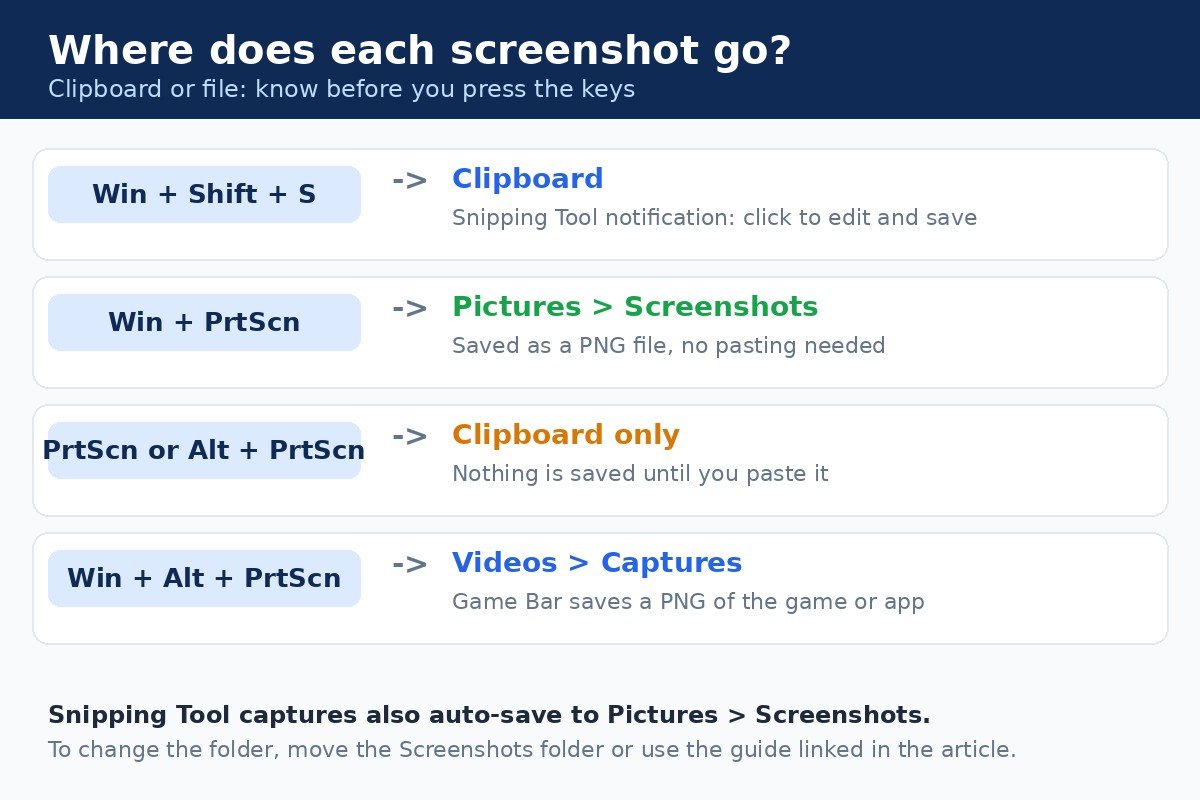
Alt + Print Screen is the quieter cousin of the full-screen capture. Click the window you want first, so it is the active one, then press Alt + Print Screen. Only that window is copied, and only to the clipboard, so paste it with Ctrl + V into Paint, Word, an email, or a chat. Use it when your desktop is cluttered and you want one app only.
Laptops add one wrinkle. On many compact keyboards Print Screen shares a key with another function, so hold Fn as well: Fn + Print Screen, or Fn + Windows key + Print Screen to auto-save. If your device has no Print Screen key, Microsoft documents Fn + Windows key + Space Bar as the alternative.
To find a saved screenshot, open File Explorer, select Pictures in the left pane, then open the Screenshots folder. If the folder is empty even though the screen dimmed, read the fixes section at the end of this guide. The file may be in OneDrive instead of the local folder. If you would rather your screenshots lived somewhere else, our guide to changing the default screenshot save folder in Windows 11 walks through moving the Screenshots folder to a location of your choice.
Use the Snipping Tool app for delays, markup, and text
The keyboard shortcut opens the Snipping Tool overlay, but the full app gives you more control. It is built into Windows 11, so there is nothing to install. Open Start, type “snipping tool”, and select Snipping Tool from the results.
- Open Snipping Tool from Start.
- Select Snipping mode and choose rectangular, window, full-screen, or freeform.
- Select New, then drag around the area or click the window you want.
- The capture opens in the Snipping Tool window. Use the pen or highlighter to draw on it, the shapes button to add a shape, or the crop button to trim the edges.
- Select Text actions to copy text straight out of the image, which is handy for an error message you want to search for.
- Save with Ctrl + S, or select Save as to choose a different location and file name. You can save as PNG, JPG, or GIF.
The delay timer is the app’s most useful hidden feature. Some things disappear the moment you click, such as an open menu or a hover tooltip. In Snipping Tool, select Delay, pick a delay of a few seconds, such as 5 seconds, then select your snipping mode and select New. Use those seconds to open the menu or hover over the item, and the screen turns gray when the countdown ends so you can draw around the area.
The same app records video too. Select the Record button, then New, or press Windows key + Shift + R, drag around the area to record, then select Start and Stop when you are done. That is a screen recording, not a screenshot, so it saves as a video file rather than an image.
Capture a game or app with Xbox Game Bar
Xbox Game Bar is the built-in overlay for games, and it has its own screenshot shortcut. Press Windows key + Alt + Print Screen while a game or app is active. Windows saves a PNG file in Videos, then Captures. You can also open the overlay with Windows key + G and click the camera icon in the Capture widget.
Game Bar suits a moment inside a game, a score screen, or a frame from an app. It captures the active game or app, not a selected region, so there is no dragging and no mode to choose. If Game Bar does not open, check that it is switched on under Settings, then Gaming, then Xbox Game Bar. For anything that is not a game or an app window, such as the desktop itself, use the Snipping Tool or Windows key + Print Screen instead.
Fix it when a screenshot goes wrong
Most screenshot problems have a simple cause, and the fix is usually a setting rather than a repair. Match what you see to the table below.
| Problem | Likely cause | Fix |
|---|---|---|
| Print Screen seems to do nothing | It copied to the clipboard | Paste with Ctrl + V, or use Win + Print Screen to save a file |
| Print Screen opens Snipping Tool instead of copying | The Print screen key setting is switched on | Settings, Accessibility, Keyboard: switch the Print screen key option off |
| No file in Pictures, then Screenshots | Pictures is backed up to OneDrive, so the file went there | Check OneDrive, then Pictures, then Screenshots |
| The screenshot is black where a video should be | Copy protection in the video app blocks the capture | Use the app’s own download or share option |
| Snipping Tool will not open | The app is missing or stalled | Restart the PC, then reinstall Snipping Tool from the Microsoft Store |
| Windows key + Shift + S does nothing | Another app took the shortcut, or Fn lock is on | Close other capture apps, check Fn lock, open Snipping Tool from Start |
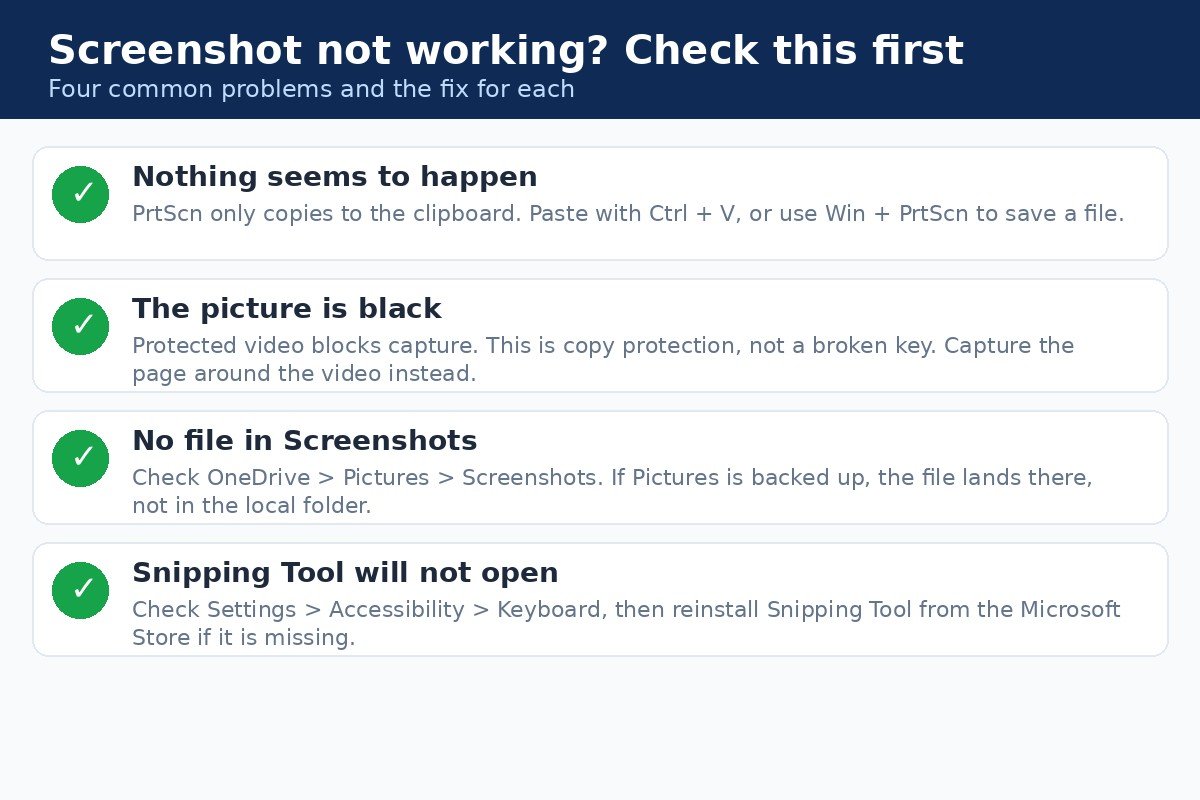
The OneDrive case looks exactly like a lost screenshot. Microsoft no longer offers a separate OneDrive setting for screenshots. When your Pictures folder is included in OneDrive backup, files saved to Pictures, then Screenshots, sync to OneDrive instead. Open OneDrive, then Pictures, then Screenshots, and your file is usually there.
A black screenshot is a different kind of problem, and it is not a fault. Streaming services and some video apps protect their video with copy protection, so a screenshot of the video area comes out black while the rest of the screen captures normally. The player controls and the page around the video usually capture fine, which is how you can tell it is protection rather than a broken key. If you need the content itself, use the download, offline viewing, or share option inside the app or service, where one exists.
If Snipping Tool itself is missing, do not hunt through system folders for it. Open the Microsoft Store, search for Snipping Tool, and install it from there. Reinstalling it restores the overlay and the Windows key + Shift + S shortcut. A restart first is worth trying, since a stalled Snipping Tool process can block the shortcut without any error message.
That covers every built-in way to take a screenshot on Windows 11. For most days, two shortcuts are enough: Windows key + Shift + S when you want part of the screen, and Windows key + Print Screen when you want a saved file of the whole screen. Keep Alt + Print Screen for one window, Snipping Tool for menus and markups, and Game Bar for games. Once you know which destination each method uses, screenshots stop vanishing, and the fix for a failed one is usually a single setting.

- How to Take a Screenshot on Windows 11 - November 18, 2026
- How to Turn Off Dynamic Lock in Windows 11 - November 17, 2026
- How to Screen Record on iPhone - November 16, 2026